How to Doodle a Blender
Step 1
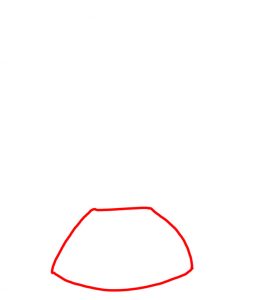
Begin by doodling an arc shape near the bottom of your page. Kind of like a smiley face. 🙂 Above this shape doodle a straight line, then connect that line with two more arc shapes as shown in the example below. This will become the base of your blender.
Step 2
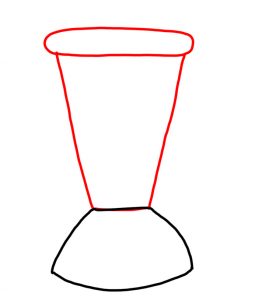
Next, doodle the top part of your blender. For this purpose use, two straight lines angled slightly outwards. Then on the very top use an eye shape that will become the lid of your blender.

Step 3
Use additional lines and angles to doodle a cap on the lid, a handle on the side, and blades coming out of the base of the blender. Furthermore, use wave-like lines that represent the liquid or banana smoothie in your blender. 😉
Step 4
Your blender isn’t going to work unless you have some buttons to play around with. Add some buttons to your blender using lines, ovals, and rectangles as shown in the example below. And if you’re feeling adventurous, add pieces of fruit or vegetables to your blender.

Step 5
The final step is to give your blender some needed color. Blenders, of course, come in a variety of colors. Therefore, feel free to use your imagination. 🙂


